Setting up your macOS terminal
Let's get our terminal ready. You can go with the built-in macOS terminal, but you would be missing out on all the benefits of making the terminal your own.
Installing Homebrew
Before we jump in and install iTerm2, I recommend having a package manager like Homebrew to make your life easier. You can install Homebrew by using the following command in your built-in Terminal. You can open Terminal with spotlight or any of your favorite system-wide search application replacements such as Raycast.
/bin/bash -c "$(curl -fsSL https://raw.githubusercontent.com/Homebrew/install/HEAD/install.sh)"
Installing iTerm2
Now that we have Homebrew installed, let's get iTerm2 installed by running the following command:
brew install --cask iterm2
Updating git
macOS has git baked in and ready to go, but we want to have the latest and greatest. You can check your current git version by running git --version. As of this writing, the current git version is 2.34.1. Now that you have your shiny new terminal, let's run the following code to install git:
brew install git
Hint: If you are seeing a git version such as
git version 2.32.0 (Apple Git-132), make sure you add your PATH to homebrew by addingexport PATH="/opt/homebrew/bin:$PATH"to your.zshrcfile.
Installing Oh-My-ZSH
Although macOS comes with zsh or z shell pre-installed as the default, we want to turn our developer environment up to 11. Use the following code to get Oh-My-ZSH installed:
sh -c "$(curl -fsSL https://raw.github.com/ohmyzsh/ohmyzsh/master/tools/install.sh)"
Installing Custom Font
What is a Nerd Font? Well, it is a collection of custom fonts that have glyphs (icons) patched in. Not only do you get a great font for coding, but you also get some great popular icons to go with them. As for my preference, I like to go with the Fira Code font as I like the ligatures that are included. Test drive any fonts that are available via Nerd Font here.
Fira Code Nerd Font
You can also install the recommended font for the theme that we will be installing.
Download these four ttf files:
Once your font is downloaded, go ahead and install our fonts via Font Book by double-clicking on the font files. For the Nerd Font, ensure you choose one of the fonts such as the ttf, or you may have an error in Font Book.
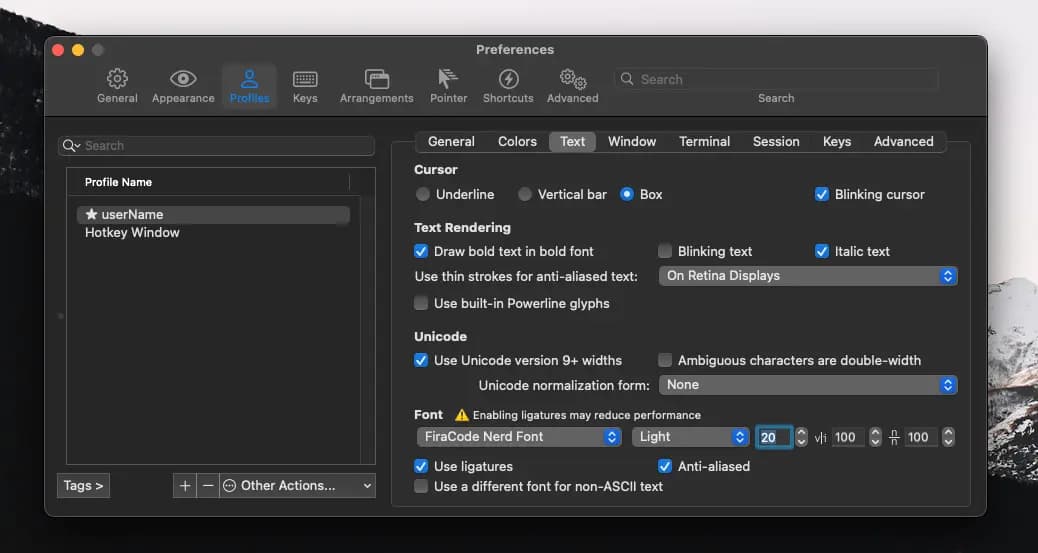
Go into iTerm2 preferences by pressing CMD+i, then going into your profile and updating the text.
Installing a Custom Terminal Theme
This is the part where it gets really spicy. Let's get our terminal a nice theme. There are quite a few out there, but the theme that stole my heart was power level 9k, now even better at power level 10K. Run the following code to get the greatness:

brew install romkatv/powerlevel10k/powerlevel10k
echo "source $(brew --prefix)/opt/powerlevel10k/powerlevel10k.zsh-theme" >>~/.zshrc
Update the default ZSH theme in the .zshrc preferences file. You can do so with your favorite text editors such as Sublime, Vim, or VS Code.
# See https://github.com/ohmyzsh/ohmyzsh/wiki/Themes
ZSH_THEME="powerlevel10k/powerlevel10k"
Once the theme is updated, let's restart ZSH by running exec zsh in iTerm2. When your terminal is refreshed, run:
p10k configure
You may be prompted to install the Meslo Nerd Font. If you already have a font that you fell in love with from previous steps, you can skip and say no. You will then be asked a few questions such as "Does this look like a diamond (rotated square)?" etc. Then you will come to what prompt style you like, and I would say the most popular is the Rainbow option. You can always go back and make changes later.
Installing plug-ins
Now your terminal is nice and shiny. Oh My ZSH community has over 200+ plug-ins that can help you supercharge your terminal to your liking. You can also find other plug-ins on Github. Any plugins not in the Oh My ZSH repo can be installed by dropping them in the ~/.oh-my-zsh/plugins directory. Enable a plugin by adding its name to the plugins array in your .zshrc file.
plugins=(git zsh-autocomplete macos)
Just make sure zsh arrays are separated by whitespace (spaces, tabs, newlines...).
Installing Color Themes
You may want to add a color theme as well, and you can do that by going into your iTerm2 preferences.
To install theme:
- Type
Command+ito open iTerm2 preferences - Navigate to the Colors tab
- Click on Load Presets
- Click on Import
- Select the .itermcolors file of the scheme you downloaded
- Click on Load Presets and choose a color scheme
Conclusion
In this post, you set up Oh My ZSH and customized it to your heart's content until you got it just right. Now go forth and be productive. Feel free to reach out via X/Twitter.